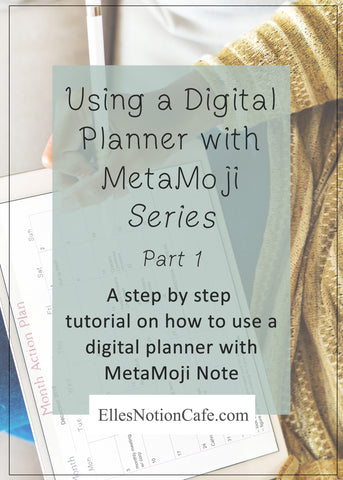
Using a Digital Planner with MetaMoji Part 1
Does the thought of digital planning just excite the heck out of you? Does that excitement plummet when every blog post or tutorial you read talks about planning on an iPad and you’re an Android and/or PC user?
Are you feeling left out of the digital planner world before you’ve even begun?
Well, you’re in luck because today we’re going to explore what it’s like using a digital planner with Metamoji Note (my new best digital planning buddy).
The fact of the matter is, there are very few digital planning resources out there for Android or PC users. I know because I am one.
I’ve spent hours searching the internet looking for digital planner apps and tutorials to help me pursue digital planning. Do you know what I found? Nothing. I realized quickly that if I wanted to learn I was going to have to teach myself. So, I did.
The best part of diving in head first?… I found a solution that fits my life perfectly!!
I am pleased to tell you this perfectly fit solution involves my new favorite digital planning app called MetaMoji Note (I know I already mentioned it above, but I felt like it needed a proper intro).
You are beyond lucky you found this post because I am going to tell you all about using MetaMoji Note to digitally plan.
In this post we’ll cover
- Where you can get this beautiful app
- All the basics of how to use MetaMoji Note
But before we dive into the meat n’ potatoes of how this app works I’m going to answer my most commonly asked digital planning questions.
Commonly Asked Questions
Can an android user use a digital planner?
Yes!! There are digital planner apps out there for android users – one of them being MetaMoji Note. Any annotation app that is in the Google Play Store or Windows Store can be used with a digital planner, you just need to find the one that works best for you.
Goodnotes vs. MetaMoji Note, what is the difference?
If you’ve researched using a digital planner at all you have probably heard of Goodnotes. You may be wondering what is the difference between Goodnotes and MetaMoji Note? Well, the only thing that separates them is that Goodnotes can only be used on an IOS devise whereas MetaMoji Note can be used with IOS, Android, and PC. Talk about versatility. 😊
Can you sync with MetaMoji Note like you can with Goodnotes?
Yes you can. Many people don’t know this but MetaMoji Note comes with free cloud service (you can buy more cloud storage space if needed) that allows you to sync across all devices. I use my digital planner on my phone, tablet, and laptop and everything is in sync.
Ok now let’s dive into exactly how MetaMoji Note works and how you can use it with your new digital planner or digital notebook.
Where To Buy
Where can I get this amazing MetaMoji Note?
Because MetaMoji Note can be used with so many different operating systems you can actually get it from several different places.
(These prices are as of February 2019)
Installing a digital planner in MetaMoji Note
Unzipping the folder your digital planner (may) come in.
Most everything that I sell comes in a zipped folder. In order to add the digital planner to MetaMoji Note you must first unzip the folder.
- After downloading go to the location where your computer automatically saves downloaded files/folders (mine saves everything to my desktop).
- When you find the folder just right click the folder > click “Extract All”.
- After it is done extracting you will now see two folders; the zipped folder and the unzipped folder. You can delete the zipped folder if you want. You won’t really need it anymore.
You should be able to open the unzipped folder just like you would any other folder. Inside you will find your new digital planner or digital notebook.
If none of this works for you there is always the option of downloading a free software like WinZip. Software like this makes unzipping really easy with just the simple click of a button.
Adding a PDF (aka digital planner) to Metamoji Note
Once your folder is unzipped you will need to add the PDF to MetaMoji Note. You can do this by…
On a laptop
- Locate PDF and right click on it
- Click “open with”
- Choose Metamoji Note
On tablet/phone
- Do a long press on the PDF
- Choose share
- Choose Metamoji Note
Jump Spots
How to use jump spots
- To use any Jump Spots that have been created click on the Jump Spots button located to the left of the pages button to open the Jump Spots panel (this panel will open to the left of your document)

- Once the panel is open you will see all of your Jump Spots.

- To use these Jump Spots just click on one of them and it will immediately take you right to that spot.
How to create jump spots
- Click on the pages button

- Click on the Jump Spots button
- Now click the “create a Jump Spot” button located to the right of the pages button

NOTE The button to the left of the number of jumps button will take you back to pages panel
- When you click the “create a Jump Spot” button a re-sizable box will appear in your document. This is the box you will resize around the text or image you would like to create a Jump Spot for.
Once you have adjusted the box around your desired text or image click the “Register” button that appears in the Jump Spot creation menu to finalize your new Jump Spot. You will now see your new Jump Spot in the Jump Spot panel.

Pages
How to duplicate, move, and add pages in MetaMoji Note
Even though we have Jump Spots for our planner you’ll still have to know how pages work and how they’ll really benefit your planning experience.
The first thing you must know is how to access the pages panel. Do this by clicking on the pages button in lower left corner.![]()
Duplicate Pages
In my digital planners and notebooks, I offer extra pages for when you would like to add pages to a certain section.This will come in handy when you want to add a daily page to a particularly busy week.
- Once the pages panel is open click on the page you want to duplicate
- Right click on that page and you will see this menu

- Click copy
- Go to the place where you would like your duplicate to be
- Click on the page where you would like the duplicate to appear UNDER
- After the page is selected right click and click paste

NOTE When you paste a page it will always appear under the page you select
Move Pages
- To move a page open the pages panel
- Click and hold the page you want to move and simply drag it to wherever you want it to be. Et voila
Add Pages
- To add a page open the pages panel
- Select the page you want the new page under
- Right click the selected page and click “Add Page”
Text
How to add and edit text
You can add text in MetaMoji Note by doing 1 of 2 things. 1) use the pen tool to write by hand (we cover how to do this in part 2 of the MetaMoji series) or 2) type the text in. You do #2 by…
Add Text
- Click on this button
 to expand the text menu
- Once open click anywhere on your document and begin typing. It really is that simple.
Edit Text
- Once you have entered your text highlight the text that you’d like to edit and then using the text editing menu (see figure below), located at the bottom of the screen, to make your desired changes.

NOTE You can select text by either clicking and dragging or by clicking “Select All” in the pop-up menu.
You can only edit text you added while using Metamoji or if the file you are using was originally created in Metamoji.
Selection Tool
How to use the selection tool
If you want to move anything anywhere in you planner this tool is essential.
- To use the selection tool, click the selection tool icon

- Once selected, draw around the object(s) you want selected
- Once everything is selected a menu will pop up giving you several options (copy, paste, group, etc)

How to group more than one object
- To group more than one object draw around the objects you want selected
- Once everything is selected a menu will pop up

- Click More > Group
- Now you can easily move all those objects at once
Wow!! Was that a marathon or what!! A lot was covered but please don’t feel rushed to get everything mastered right now. Learning something new takes time so come back to this post whenever you need.
Let me know below how MetaMoji Note is working out for you. Do you like it?
If you have any questions let me know!!!
Leave a comment